I just installed VirtualBox on my laptop, so that I can run one or two VMs on there, and the installation and setup are really quite straightforward. The “First Steps” section in the documentation here is good enough to see you through the, er, first steps, but there are a couple of other things they really ought to put in this section, rather than later on in the documentation.
One of the first things I wanted to do was change my screen resolution, because it defaulted to 800×600 and didn’t give me any better options. So, it turns out (if you bother to read as far as chapter 4 of the online docs) that to do this you must install some “Guest Additions”… and this is how you do it:
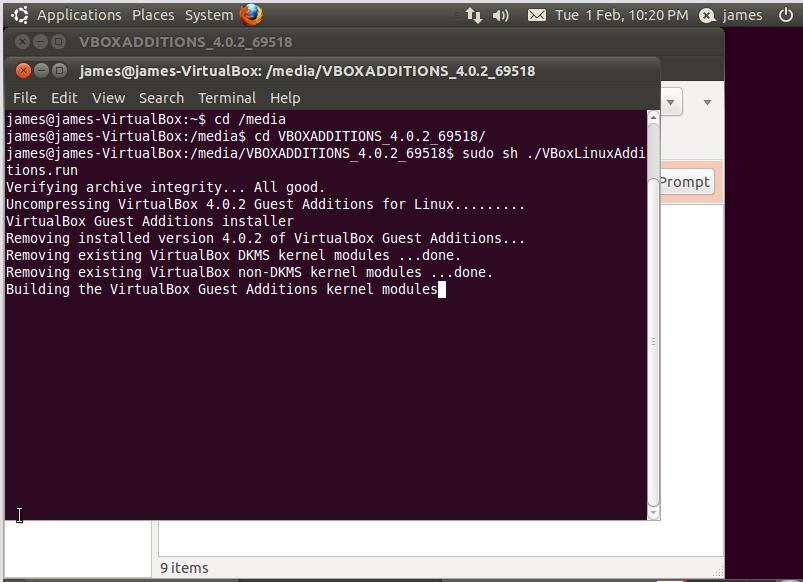
Open a terminal and cd to where your virtual CD drive appears, in my case it was in /media/VBOXADDITIONS_4.0.2_69518/ (see image below – click on image for larger pic)

Next, run the correct installer. I was running a Linux VM so I chose VBoxLinuxAdditions.run. Run this file by typing “sudo sh ./VBoxLinuxAdditions.run”, as shown below:

Once this has completed it’ll give you a message telling you to restart the guest system, as shown below:

So do as it says, shut down the VM, open VirtualBox and start up your VM again. Now we can go into System > Monitor Preferences, and you should see something like the screen below, with the new (better) screen resolution available to you:


I think the networking angle makes it worth the price. You have a group of peploe going through the same process and you come in contract with peploe who have access. 3mo is a lot of time but if you can work virtually why not.