Installing Artifactory on Ubuntu
I was messing around with some permissions settings on our “Live” verison of Artifactory, as you do, and then suddenly I thought “No! This feels wrong… I’m sure there’s someone who would be having a fit right now if he knew I was guffing around with the permissions on the live version of Artifactory…”. That someone is of course me. So I duly pressed cancel, and decided to do things “properly”, i.e. install a local version of Artifactory and mess around with that one instead.
Easier said than done.
How NOT to Install Artifactory on Ubuntu
If you want to know how to install Artifactory on Ubuntu, I’d suggest skipping to the “How to Install Artifactory on Ubuntu” section, below. However, if you’d love to know exactly how to NOT install Artifactory on Ubuntu while following the Artifactory installation instructions and getting really annoyed, then read on!
I decided to install it on my Ubuntu VirtualBox VM, because surely that would be easier than installing it on my Windows box, right? My Ubuntu VM is running java 1.7. So I downloaded the artifactory zip and extracted it. Dead easy! Then I followed this particular instruction on the artifactory installation webpage:
Before you install is recommended you first verify your current environment by running
artifactoryctl checkunder the$ARTIFACTORY_HOME/binfolder
But by default it wasn’t executable, so I had to chmod it, duuuuh! So I did that, ran it, and I got the following error:
ARTIFACTORY_HOME not set
Er, well, no, I haven’t set ARTIFACTORY_HOME, that’s true. I had no idea I had to set it anywhere. So I set it in my profile, sourced it, and all that stuff.
I ran the artifactoryctl check command again and got another message saying:
Cannot find a JRE or JDK. Please set JAVA_HOME to a >=1.5
But that’s rubbish! I totally have 1.7 installed!! I checked my paths and all the rest. All looked fine to me. After a little while I got bored of seeing that exact same message, so I decided to just stop bothering with this stupid “artifactoryctl check” thing, and just moved on with the installation by running the $ARTIFACTORY_HOME/bin/install.sh script
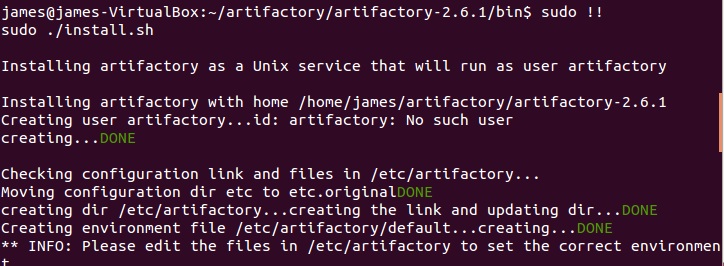
Gah! Not logged in as root. Sudo sudo sudo.
That’s better. I got a little message saying “SUCCESS” which was nice, followed by:
Installation of Artifactory completed. You can now check installation by running:
> service artifactory check
Okey dokey then, I’ll go do that!
Gahh!!! SUDO MAKE ME A SANDWICH!!!
Sudo !! is probably my most frequently typed command, along with “ll” (swiftly followed by “ls -a” when I realsie the ll alias hasn’t been setup. I’m an idiot, ya’see).
Anyway, following a swift sudo !! I got the following message:
Found JAVA= in JAVA_HOME=
Cannot find a JRE or JDK. Please set JAVA_HOME to a >=1.5 JRE
Erm, I’m pretty sure that’s not right. I definitely remember installing Java 1.7 and setting JAVA_HOME. So I echoed JAVA_HOME. Sure enough, it’s pointing to my 1.7 installation path.
Turns out that setting it in my bash profile wasn’t good enough, and I had to also put it in the following file:
/etc/artifactory/default
Oh, and don’t put the symlink path in for JAVA_HOME, that didn’t work. I had to put the full path in (/usr/bin/java got me nowhere). I literally had to put the full location in (mine was /usr/lib/jvm/java-7-openjdk-amd64/jre/). Anyway, that just about did it. Piss easy!
How to Install Artifactory on Ubuntu
- Make sure you’ve got Java 1.5 or above installed, and make a note of the full path, as you’re going to need this later (mine was /usr/lib/jvm/java-7-openjdk-amd64/jre/).
- Download the artifactory zip and extract it somewhere.
- Go to your artifactory bin dir and make the install.sh file executable
- Now run sudo ./install.sh – this will copy some files around the place and setup some paths.
- Edit the file /etc/artifactory/default and put the FULL Java path in there as JAVA_HOME
- Make sure JAVA_HOME is also set in /etc/environment
- run “sudo service artifactory check”
- If it all looks good run “sudo service artifactory start”
- Go to http://localhost:8081/artifactory/
- You’re done!


